
Welcome to "Vegan for a Healthy Life." We would love you to post ideas and recipes to the group. Whether you are a "Raw" Vegan, Vegetarian, follow the 80-10-10, congratulations on taking that step. We can all learn together.
Wednesday, December 31, 2014
Try this for a night you do not want to cook...
http://www.twopeasandtheirpod.com/slow-cooker-lentil-chili/print/
Try this for a night you do not want to cook...
http://www.twopeasandtheirpod.com/slow-cooker-lentil-chili/print/
Happy New Years Eve morning
http://www.onegreenplanet.org/vegan-recipe/macadamia-nut-spreadable-pepper-herb-feta/
Happy New Years Eve morning
http://www.onegreenplanet.org/vegan-recipe/macadamia-nut-spreadable-pepper-herb-feta/
Tuesday, December 30, 2014
Turmeric - is it in your daily diet?
3 Reasons to Eat Turmeric

One of the most comprehensive summaries of turmeric studies to date was published by the respected ethnobotanist James A. Duke, Phd., in the October, 2007 issue of Alternative & Complementary Therapies, and summarized in the July, 2008, issue of the American Botanical Council publication HerbClip.
Reviewing some 700 studies, Duke concluded that turmeric appears to outperform many pharmaceuticals in its effects against several chronic, debilitating diseases, and does so with virtually no adverse side effects. Here are some of the diseases that turmeric has been found to help prevent or alleviate:
- Alzheimer's disease: Duke found more than 50 studies on turmeric's effects in addressing Alzheimer's disease. The reports indicate that extracts of turmeric contain a number of natural agents that block the formation of beta-amyloid, the substance responsible for the plaques that slowly obstruct cerebral function in Alzheimer's disease.
- Arthritis: Turmeric contains more than two dozen anti-inflammatory compounds, including sixdifferent COX-2-inhibitors (the COX-2 enzyme promotes pain, swelling and inflammation; inhibitors selectively block that enzyme). By itself, writes Duke, curcumin - the component in turmeric most often cited for its healthful effects - is a multifaceted anti-inflammatory agent, and studies of the efficacy of curcumin have demonstrated positive changes in arthritic symptoms.
- Cancer: Duke found more than 200 citations for turmeric and cancer and more than 700 for curcumin and cancer. He noted that in the handbook Phytochemicals: Mechanisms of Action, curcumin and/or turmeric were effective in animal models in prevention and/or treatment of colon cancer, mammary cancer, prostate cancer, murine hepatocarcinogenesis (liver cancer in rats), esophageal cancer, and oral cancer. Duke said that the effectiveness of the herb against these cancers compared favorably with that reported for pharmaceuticals.
And, of course, one can simply indulge in more curried dishes, either in restaurants or at home. However you do it, adding turmeric to your diet is one of the best moves toward optimal health you can make.
Turmeric - is it in your daily diet?
3 Reasons to Eat Turmeric
One of the most comprehensive summaries of turmeric studies to date was published by the respected ethnobotanist James A. Duke, Phd., in the October, 2007 issue of Alternative & Complementary Therapies, and summarized in the July, 2008, issue of the American Botanical Council publication HerbClip.
Reviewing some 700 studies, Duke concluded that turmeric appears to outperform many pharmaceuticals in its effects against several chronic, debilitating diseases, and does so with virtually no adverse side effects. Here are some of the diseases that turmeric has been found to help prevent or alleviate:
- Alzheimer's disease: Duke found more than 50 studies on turmeric's effects in addressing Alzheimer's disease. The reports indicate that extracts of turmeric contain a number of natural agents that block the formation of beta-amyloid, the substance responsible for the plaques that slowly obstruct cerebral function in Alzheimer's disease.
- Arthritis: Turmeric contains more than two dozen anti-inflammatory compounds, including sixdifferent COX-2-inhibitors (the COX-2 enzyme promotes pain, swelling and inflammation; inhibitors selectively block that enzyme). By itself, writes Duke, curcumin - the component in turmeric most often cited for its healthful effects - is a multifaceted anti-inflammatory agent, and studies of the efficacy of curcumin have demonstrated positive changes in arthritic symptoms.
- Cancer: Duke found more than 200 citations for turmeric and cancer and more than 700 for curcumin and cancer. He noted that in the handbook Phytochemicals: Mechanisms of Action, curcumin and/or turmeric were effective in animal models in prevention and/or treatment of colon cancer, mammary cancer, prostate cancer, murine hepatocarcinogenesis (liver cancer in rats), esophageal cancer, and oral cancer. Duke said that the effectiveness of the herb against these cancers compared favorably with that reported for pharmaceuticals.
And, of course, one can simply indulge in more curried dishes, either in restaurants or at home. However you do it, adding turmeric to your diet is one of the best moves toward optimal health you can make.
Monday, December 29, 2014
Starting this today
Raw Vegan Flax Seed Crackers Recipe
Raw flax seed crackers are a popular snack for those on raw food diet. Even if you're just looking to include more flax seed in your diet or more raw foods, try this dehydrated flaxseed cracker recipe for a satisfying crunch. Flaxseed crackers are great with raw salsa, raw guacamole or raw hummus (pictured). I like to add garlic salt to my flax crackers, but this may not be suitable for those on a 100% raw food diet.Want to add some veggies to your flax crackers? Add a bit of grated carrots, zucchini, or whatever you have on hand.
If you like these raw flax crackers, you might also want to try making these similar raw food corn chips.
Ingredients
- 2 cups whole flaxseeds
- approx 2 cups water
- 1/4 cup tamari, Braggs Liquid Aminos or nama shoyu raw soy sauce
- sea salt to taste
- 1 tbsp fresh minced herbs (optional)
Preparation
In a medium sized bowl, cover the flax seed crackers with water and allow to soak for at least 1 1/2 hours. The water will turn to a gelatinous goo. Check the mixture, and add more water if needed. You want the mixture to be gooey, but not runny, and not too thick.Stir in the tamari, Liquid Aminos or nama shoyu sauce, sea salt and fresh herbs. You can also get creative and add some extra flavors - a quirt of lime juice, minced ginger, chili powder or cayenne pepper - depending on your tastes.
Spread the mixture about 1/8 inch thick on your dehydrator's paraflexx or teflex sheets.
Set your dehydrator to about 110 degrees, and dehydrate for 4-6 hours. Turn the mixture over, and dehydrate another 3 - 4 hours. If you like a crispy and crunchy cracker, dehydrate a bit longer. I like my flaxseed crackers a bit chewier, so I dehydrate them a bit less. Break or slice your crackers into pieces when finished dehydrating.
Raw flaxseed crackers are an excellent snack on their own, or served with a raw salsa, guacamole, raw hummus or another raw food dip.
Sunday, December 28, 2014
Did a little too much over the Holidays so far...
Check out these yummy ideas to get your sweet tooth and tummy happy.
Easy as Pie: Pie-in-a-Glass Smoothies
Skip the food coma this year with these convenient, healthy pie-in-a-glass recipes from The Blender Girl, Tess Masters. These taste like the real deal, so they’ll get gulped down real quick!
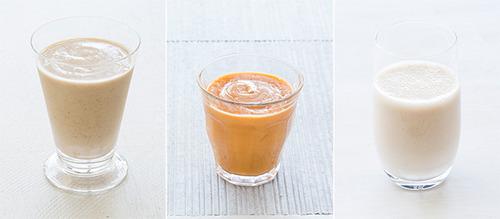
Get your pie fix faster than you can preheat the oven this holiday season with these three pie in a glass smoothies from The Blender Girl Smoothies app. These delectable shakes are so rich and creamy, they’re reminiscent of that perfect bite—a la mode, of course. They’re healthy, made with whole foods, contain no refined sugar, and you can even add some veggies into the mix (and kids will still love them)!
Here’s some tips for making amazing dessert-style smoothies:
- Start with a base of 1 cup of water or milk or your choice. I like almond milk because it’s rich and creamy with a mild flavor. You may need to add more depending on your other ingredients.
- Use raw cashews to replicate the taste of buttery pastry. As a general rule, use 1 cup water or almond milk to ½ cup raw unsalted cashews. Add more to taste. If you want to approximate the flavor of batter for a muffin, cake, or pop tart effect add ¼ cup rolled oats with the cashews.
- Add your base flavor: 1 cup of stewed fruit like apples, peaches, or apricots, 1 cup of canned or mashed vegetables like pumpkin or sweet potato, 1 to 2 cups of frozen fruit like berries or bananas. Add more to taste.
- Use fresh ginger and ground spices like cinnamon, nutmeg, cardamom, and cloves to add some magic to the mix. Always start small with a pinch and add gradually to taste so as not to overpower the star flavors.
- A splash of natural vanilla extract can help boost flavor. I always start with ½ teaspoon and add to taste. Sometimes a blend can handle 1 teaspoon up to 1 tablespoon.
- Add a small pinch of natural salt like Celtic sea salt to bring out the natural sweetness and flavor of fruits and vegetables.
- Boost dessert-style smoothies with ¼ cup of frozen or fresh raw cauliflower or broccoli. You won’t even taste it, and it’s a great way to get some extra veggies into the kids.
- Boost the nutritional content of these sweet shakes with 1 teaspoon of healthy cold-pressed flax oil without altering flavor.
- Sweeten your pie with liquid stevia (start with 5 drops and add to taste) or pure maple syrup, coconut nectar, or coconut sugar. Start with 1 tablespoon and add to taste.
- Balance the natural sugar content of these decadent shakes with ½ teaspoon probiotic powder. If you have capsules, simply break open the pods to release the powder. These powders are milk in flavor and slip in undetected.
Did a little too much over the Holidays so far...
Check out these yummy ideas to get your sweet tooth and tummy happy.
Easy as Pie: Pie-in-a-Glass Smoothies
Skip the food coma this year with these convenient, healthy pie-in-a-glass recipes from The Blender Girl, Tess Masters. These taste like the real deal, so they’ll get gulped down real quick!
Get your pie fix faster than you can preheat the oven this holiday season with these three pie in a glass smoothies from The Blender Girl Smoothies app. These delectable shakes are so rich and creamy, they’re reminiscent of that perfect bite—a la mode, of course. They’re healthy, made with whole foods, contain no refined sugar, and you can even add some veggies into the mix (and kids will still love them)!
Here’s some tips for making amazing dessert-style smoothies:
- Start with a base of 1 cup of water or milk or your choice. I like almond milk because it’s rich and creamy with a mild flavor. You may need to add more depending on your other ingredients.
- Use raw cashews to replicate the taste of buttery pastry. As a general rule, use 1 cup water or almond milk to ½ cup raw unsalted cashews. Add more to taste. If you want to approximate the flavor of batter for a muffin, cake, or pop tart effect add ¼ cup rolled oats with the cashews.
- Add your base flavor: 1 cup of stewed fruit like apples, peaches, or apricots, 1 cup of canned or mashed vegetables like pumpkin or sweet potato, 1 to 2 cups of frozen fruit like berries or bananas. Add more to taste.
- Use fresh ginger and ground spices like cinnamon, nutmeg, cardamom, and cloves to add some magic to the mix. Always start small with a pinch and add gradually to taste so as not to overpower the star flavors.
- A splash of natural vanilla extract can help boost flavor. I always start with ½ teaspoon and add to taste. Sometimes a blend can handle 1 teaspoon up to 1 tablespoon.
- Add a small pinch of natural salt like Celtic sea salt to bring out the natural sweetness and flavor of fruits and vegetables.
- Boost dessert-style smoothies with ¼ cup of frozen or fresh raw cauliflower or broccoli. You won’t even taste it, and it’s a great way to get some extra veggies into the kids.
- Boost the nutritional content of these sweet shakes with 1 teaspoon of healthy cold-pressed flax oil without altering flavor.
- Sweeten your pie with liquid stevia (start with 5 drops and add to taste) or pure maple syrup, coconut nectar, or coconut sugar. Start with 1 tablespoon and add to taste.
- Balance the natural sugar content of these decadent shakes with ½ teaspoon probiotic powder. If you have capsules, simply break open the pods to release the powder. These powders are milk in flavor and slip in undetected.
Happy Sunday!
Good morning to all. Trying this from my phone. Updates later!
Peace, love, happiness to all.
Happy Sunday!
Good morning to all. Trying this from my phone. Updates later!
Peace, love, happiness to all.
Friday, December 26, 2014
Happy Day after Christmas
I hope everyone had a lovely Christmas with friends and families. I also hope you enjoyed the The Twelve Days of Yummy Recipes.
I will be posting later today but in the meantime....
Thank you for stopping by.
Happy Day after Christmas
I hope everyone had a lovely Christmas with friends and families. I also hope you enjoyed the The Twelve Days of Yummy Recipes.
I will be posting later today but in the meantime....
Thank you for stopping by.
Thursday, December 25, 2014
Merry Christmas!!!!
Wishing everyone a very Merry Christmas.
Here is our yummy recipe of the day from One Green Planet

Blueberry Strawberry Banana Ice Cream Cake
Ingredients
- 10 strawberries for outside, cut in half
- 2 cups cashews
- 2 bananas
- 1 cup dates
- 1/4 cup melted coconut oil
- Seeds from 1/2 vanilla pod (or 1/2 teaspoons vanilla extract)
- Vegan milk or coconut water, as needed
- 1 cup frozen blueberries
- 1 cup frozen strawberries
- 1 cup fave vegan milk or coconut water, use as needed
- 1 cup dates, walnuts or another banana
Preparation
- To make the first layer: place the halved strawberries around the edge of a spring form pan. Set aside. Now blend all the vanilla ice cream cake ingredients together until smooth, adding as little vegan milk or coconut water as possible (I used about 1/4 cup?). Spread into the bottom of the pan, this should press the berries to the inner edge. Put in the freezer.
- To make the berry layer: blend it all up until smooth. Carefully spread over top of the vanilla ice cream cake layer and put in the freezer for about 2 or 3 hours, until it’s set. Then cut and serve with other berries! Let it soften a little before eating, because it makes it creamier.
Merry Christmas!!!!
Wishing everyone a very Merry Christmas.
Here is our yummy recipe of the day from One Green Planet
Blueberry Strawberry Banana Ice Cream Cake
Ingredients
- 10 strawberries for outside, cut in half
- 2 cups cashews
- 2 bananas
- 1 cup dates
- 1/4 cup melted coconut oil
- Seeds from 1/2 vanilla pod (or 1/2 teaspoons vanilla extract)
- Vegan milk or coconut water, as needed
- 1 cup frozen blueberries
- 1 cup frozen strawberries
- 1 cup fave vegan milk or coconut water, use as needed
- 1 cup dates, walnuts or another banana
Preparation
- To make the first layer: place the halved strawberries around the edge of a spring form pan. Set aside. Now blend all the vanilla ice cream cake ingredients together until smooth, adding as little vegan milk or coconut water as possible (I used about 1/4 cup?). Spread into the bottom of the pan, this should press the berries to the inner edge. Put in the freezer.
- To make the berry layer: blend it all up until smooth. Carefully spread over top of the vanilla ice cream cake layer and put in the freezer for about 2 or 3 hours, until it’s set. Then cut and serve with other berries! Let it soften a little before eating, because it makes it creamier.
Wednesday, December 24, 2014
Vegan for a Healthy Life : On the Eleventh Day of Christmas....
Vegan for a Healthy Life : On the Eleventh Day of Christmas....: On the Eleventh Day of Christmas...an oldie but a yummy. Eat Raw Dessert First Tuxedo Cheesecake Brownies Servings: 16 ba...
Vegan for a Healthy Life : On the Eleventh Day of Christmas....
Vegan for a Healthy Life : On the Eleventh Day of Christmas....: On the Eleventh Day of Christmas...an oldie but a yummy. Eat Raw Dessert First Tuxedo Cheesecake Brownies Servings: 16 ba...
On the Eleventh Day of Christmas....
On the Eleventh Day of Christmas...an oldie but a yummy.

• Oil-Free Variation
• Lower-Fat Variation
• No Added Sugars
EQUIPMENT
Measuring cups and spoons
Food processor
8-inch square baking pan
Plastic wrap (optional)
Blender
Spoon or spatula
INGREDIENTS FOR BROWNIE LAYER
1 cup dry pecans
1 cup dry walnuts
1/3 cup cacao powder
1/8 teaspoon sea salt
3/4 cup pitted dates
INGREDIENTS FOR CHEESECAKE LAYER
1 cup cashews, soaked for 2 to 4 hours and drained
1/4 cup water or nondairy milk of choice
2 tablespoons melted coconut oil
2 tablespoons lemon juice
1/2 teaspoon vanilla extract
1/8 teaspoon sea salt
30 drops liquid stevia ({your favorite liquid sweetener}), or to taste
INSTRUCTIONS FOR BROWNIE LAYERS
1. In a food processor, combine the pecans, walnuts, cacao powder, and salt and pulse until finely ground (be careful not to overprocess).
2. Add the dates, 2 to 3 at a time, pulsing between additions until each date is well-incorporated and the mixture is sticky.
3. Taste for sweetness, and add another date or some stevia if desired.
4. Press half of the mixture (about 1 heaping cup) firmly and evenly into an 8-inch square baking pan (lined with plastic wrap for easy removal, if desired).
5. Place the pan in the freezer to chill.
6. Set the other half of the mixture aside while you make the cheesecake layer.
INSTRUCTIONS FOR CHEESECAKE LAYER
1. In a high-speed blender, combine the cashews, water, coconut oil, lemon juice, vanilla, salt, and stevia and blend until smooth. You can add more water, a teaspoon at a time, as needed to help the mixture blend.
2. Taste for sweetness and add more stevia if desired.
3. Remove the pan from the freezer and transfer the cheesecake mixture onto the brownie layer, spreading it evenly with a spoon or spatula.
4. Place the pan back in the freezer for 1 to 2 hours to allow the cheesecake layer to firm up.
5. Once frozen, remove the pan from the freezer again, and evenly scatter the remaining half of the brownie mixture on top of the cheesecake layer. Gently but firmly press the brownie bits into the cheesecake. You may still be able to see the cheesecake layer underneath; that’s ok.
6. Place in the refrigerator for at least 2 hours before cutting and serving.
SPECIAL NOTES
Store the brownies in an airtight container in the refrigerator for up to a week or in the freezer for up to a month.
Though best served cold, straight from the fridge, you can bring them to room temperature before serving if you prefer; you just may need to eat them with a fork instead of your hands!
Per serving: 189 calories, 15.6g, fat (3g sat), 12.5g carbs, 3g fiber, 4g protein
SUBSTITUTIONS
• Pecans: additional walnuts, or macadamia nuts or almonds
• Walnuts: additional pecans, or almonds or Brazil nuts
• Cacao powder: unsweetened cocoa powder or carob powder
• Dates: soft raisins
• Cashews: macadamia nuts
VARIATIONS
• Lower-Fat: Replace 1/2 to 3/4 cup of the nuts (any kind) with old-fashioned rolled oats.
• Oil-Free: Replace the coconut oil in the cheesecake layer with coconut butter, adding extra water if needed to blend the mixture smoothly.
Eat Raw Dessert First

Tuxedo Cheesecake Brownies
Servings: 16 bars
• Grain-FreeServings: 16 bars
• Oil-Free Variation
• Lower-Fat Variation
• No Added Sugars
EQUIPMENT
Measuring cups and spoons
Food processor
8-inch square baking pan
Plastic wrap (optional)
Blender
Spoon or spatula
INGREDIENTS FOR BROWNIE LAYER
1 cup dry pecans
1 cup dry walnuts
1/3 cup cacao powder
1/8 teaspoon sea salt
3/4 cup pitted dates
INGREDIENTS FOR CHEESECAKE LAYER
1 cup cashews, soaked for 2 to 4 hours and drained
1/4 cup water or nondairy milk of choice
2 tablespoons melted coconut oil
2 tablespoons lemon juice
1/2 teaspoon vanilla extract
1/8 teaspoon sea salt
30 drops liquid stevia ({your favorite liquid sweetener}), or to taste
INSTRUCTIONS FOR BROWNIE LAYERS
1. In a food processor, combine the pecans, walnuts, cacao powder, and salt and pulse until finely ground (be careful not to overprocess).
2. Add the dates, 2 to 3 at a time, pulsing between additions until each date is well-incorporated and the mixture is sticky.
3. Taste for sweetness, and add another date or some stevia if desired.
4. Press half of the mixture (about 1 heaping cup) firmly and evenly into an 8-inch square baking pan (lined with plastic wrap for easy removal, if desired).
5. Place the pan in the freezer to chill.
6. Set the other half of the mixture aside while you make the cheesecake layer.
INSTRUCTIONS FOR CHEESECAKE LAYER
1. In a high-speed blender, combine the cashews, water, coconut oil, lemon juice, vanilla, salt, and stevia and blend until smooth. You can add more water, a teaspoon at a time, as needed to help the mixture blend.
2. Taste for sweetness and add more stevia if desired.
3. Remove the pan from the freezer and transfer the cheesecake mixture onto the brownie layer, spreading it evenly with a spoon or spatula.
4. Place the pan back in the freezer for 1 to 2 hours to allow the cheesecake layer to firm up.
5. Once frozen, remove the pan from the freezer again, and evenly scatter the remaining half of the brownie mixture on top of the cheesecake layer. Gently but firmly press the brownie bits into the cheesecake. You may still be able to see the cheesecake layer underneath; that’s ok.
6. Place in the refrigerator for at least 2 hours before cutting and serving.
SPECIAL NOTES
Store the brownies in an airtight container in the refrigerator for up to a week or in the freezer for up to a month.
Though best served cold, straight from the fridge, you can bring them to room temperature before serving if you prefer; you just may need to eat them with a fork instead of your hands!
Per serving: 189 calories, 15.6g, fat (3g sat), 12.5g carbs, 3g fiber, 4g protein
SUBSTITUTIONS
• Pecans: additional walnuts, or macadamia nuts or almonds
• Walnuts: additional pecans, or almonds or Brazil nuts
• Cacao powder: unsweetened cocoa powder or carob powder
• Dates: soft raisins
• Cashews: macadamia nuts
VARIATIONS
• Lower-Fat: Replace 1/2 to 3/4 cup of the nuts (any kind) with old-fashioned rolled oats.
• Oil-Free: Replace the coconut oil in the cheesecake layer with coconut butter, adding extra water if needed to blend the mixture smoothly.
This recipe was originally found in Raw News Bites, Eva Rawposa’s free weekly e-zine for raw food lovers and anyone looking to feel great. You can get your FREE recipes and tips, and your free subscription to Raw News Bites, at www.uncooking101.com. PLUS you will receive a link to download Eva’s book “Around the World in 8 Easy Recipes” when you sign up, as your WELCOME GIFT!
On the Eleventh Day of Christmas....
On the Eleventh Day of Christmas...an oldie but a yummy.
• Oil-Free Variation
• Lower-Fat Variation
• No Added Sugars
EQUIPMENT
Measuring cups and spoons
Food processor
8-inch square baking pan
Plastic wrap (optional)
Blender
Spoon or spatula
INGREDIENTS FOR BROWNIE LAYER
1 cup dry pecans
1 cup dry walnuts
1/3 cup cacao powder
1/8 teaspoon sea salt
3/4 cup pitted dates
INGREDIENTS FOR CHEESECAKE LAYER
1 cup cashews, soaked for 2 to 4 hours and drained
1/4 cup water or nondairy milk of choice
2 tablespoons melted coconut oil
2 tablespoons lemon juice
1/2 teaspoon vanilla extract
1/8 teaspoon sea salt
30 drops liquid stevia ({your favorite liquid sweetener}), or to taste
INSTRUCTIONS FOR BROWNIE LAYERS
1. In a food processor, combine the pecans, walnuts, cacao powder, and salt and pulse until finely ground (be careful not to overprocess).
2. Add the dates, 2 to 3 at a time, pulsing between additions until each date is well-incorporated and the mixture is sticky.
3. Taste for sweetness, and add another date or some stevia if desired.
4. Press half of the mixture (about 1 heaping cup) firmly and evenly into an 8-inch square baking pan (lined with plastic wrap for easy removal, if desired).
5. Place the pan in the freezer to chill.
6. Set the other half of the mixture aside while you make the cheesecake layer.
INSTRUCTIONS FOR CHEESECAKE LAYER
1. In a high-speed blender, combine the cashews, water, coconut oil, lemon juice, vanilla, salt, and stevia and blend until smooth. You can add more water, a teaspoon at a time, as needed to help the mixture blend.
2. Taste for sweetness and add more stevia if desired.
3. Remove the pan from the freezer and transfer the cheesecake mixture onto the brownie layer, spreading it evenly with a spoon or spatula.
4. Place the pan back in the freezer for 1 to 2 hours to allow the cheesecake layer to firm up.
5. Once frozen, remove the pan from the freezer again, and evenly scatter the remaining half of the brownie mixture on top of the cheesecake layer. Gently but firmly press the brownie bits into the cheesecake. You may still be able to see the cheesecake layer underneath; that’s ok.
6. Place in the refrigerator for at least 2 hours before cutting and serving.
SPECIAL NOTES
Store the brownies in an airtight container in the refrigerator for up to a week or in the freezer for up to a month.
Though best served cold, straight from the fridge, you can bring them to room temperature before serving if you prefer; you just may need to eat them with a fork instead of your hands!
Per serving: 189 calories, 15.6g, fat (3g sat), 12.5g carbs, 3g fiber, 4g protein
SUBSTITUTIONS
• Pecans: additional walnuts, or macadamia nuts or almonds
• Walnuts: additional pecans, or almonds or Brazil nuts
• Cacao powder: unsweetened cocoa powder or carob powder
• Dates: soft raisins
• Cashews: macadamia nuts
VARIATIONS
• Lower-Fat: Replace 1/2 to 3/4 cup of the nuts (any kind) with old-fashioned rolled oats.
• Oil-Free: Replace the coconut oil in the cheesecake layer with coconut butter, adding extra water if needed to blend the mixture smoothly.
Eat Raw Dessert First
Tuxedo Cheesecake Brownies
Servings: 16 bars
• Grain-FreeServings: 16 bars
• Oil-Free Variation
• Lower-Fat Variation
• No Added Sugars
EQUIPMENT
Measuring cups and spoons
Food processor
8-inch square baking pan
Plastic wrap (optional)
Blender
Spoon or spatula
INGREDIENTS FOR BROWNIE LAYER
1 cup dry pecans
1 cup dry walnuts
1/3 cup cacao powder
1/8 teaspoon sea salt
3/4 cup pitted dates
INGREDIENTS FOR CHEESECAKE LAYER
1 cup cashews, soaked for 2 to 4 hours and drained
1/4 cup water or nondairy milk of choice
2 tablespoons melted coconut oil
2 tablespoons lemon juice
1/2 teaspoon vanilla extract
1/8 teaspoon sea salt
30 drops liquid stevia ({your favorite liquid sweetener}), or to taste
INSTRUCTIONS FOR BROWNIE LAYERS
1. In a food processor, combine the pecans, walnuts, cacao powder, and salt and pulse until finely ground (be careful not to overprocess).
2. Add the dates, 2 to 3 at a time, pulsing between additions until each date is well-incorporated and the mixture is sticky.
3. Taste for sweetness, and add another date or some stevia if desired.
4. Press half of the mixture (about 1 heaping cup) firmly and evenly into an 8-inch square baking pan (lined with plastic wrap for easy removal, if desired).
5. Place the pan in the freezer to chill.
6. Set the other half of the mixture aside while you make the cheesecake layer.
INSTRUCTIONS FOR CHEESECAKE LAYER
1. In a high-speed blender, combine the cashews, water, coconut oil, lemon juice, vanilla, salt, and stevia and blend until smooth. You can add more water, a teaspoon at a time, as needed to help the mixture blend.
2. Taste for sweetness and add more stevia if desired.
3. Remove the pan from the freezer and transfer the cheesecake mixture onto the brownie layer, spreading it evenly with a spoon or spatula.
4. Place the pan back in the freezer for 1 to 2 hours to allow the cheesecake layer to firm up.
5. Once frozen, remove the pan from the freezer again, and evenly scatter the remaining half of the brownie mixture on top of the cheesecake layer. Gently but firmly press the brownie bits into the cheesecake. You may still be able to see the cheesecake layer underneath; that’s ok.
6. Place in the refrigerator for at least 2 hours before cutting and serving.
SPECIAL NOTES
Store the brownies in an airtight container in the refrigerator for up to a week or in the freezer for up to a month.
Though best served cold, straight from the fridge, you can bring them to room temperature before serving if you prefer; you just may need to eat them with a fork instead of your hands!
Per serving: 189 calories, 15.6g, fat (3g sat), 12.5g carbs, 3g fiber, 4g protein
SUBSTITUTIONS
• Pecans: additional walnuts, or macadamia nuts or almonds
• Walnuts: additional pecans, or almonds or Brazil nuts
• Cacao powder: unsweetened cocoa powder or carob powder
• Dates: soft raisins
• Cashews: macadamia nuts
VARIATIONS
• Lower-Fat: Replace 1/2 to 3/4 cup of the nuts (any kind) with old-fashioned rolled oats.
• Oil-Free: Replace the coconut oil in the cheesecake layer with coconut butter, adding extra water if needed to blend the mixture smoothly.
This recipe was originally found in Raw News Bites, Eva Rawposa’s
free weekly e-zine for raw food lovers and anyone looking to feel
great. You can get your FREE recipes and tips, and your free
subscription to Raw News Bites, at www.uncooking101.com.
PLUS you will receive a link to download Eva’s book “Around the World
in 8 Easy Recipes” when you sign up, as your WELCOME GIFT!
Tuesday, December 23, 2014
On the Tenth Day of Christmas- well yes I did miss a day
On the Tenth Day of Christmas - I recovered from a stomach virus and lovingly bring you this recipe.
 http://www.onegreenplanet.org/vegan-recipe/peppermint-brownies/
Peppermint Brownies [Vegan, Raw, Gluten-Free]

This Recipe is :
Dairy FreeRaw VeganVeganWheat FreeServes
8-12Ingredients
For the Brownies:
- 2 cups walnuts
- 2 cups dates, soaked and pitted
- 3 Tbs cacao powder
- pinch of sea salt
- 1/2 cup coconut butter
- 1/4 cup coconut oil
- 2 Tbs maple syrup
- 1 tsp peppermint extract
Preparation
For the Brownies:
- Soak the walnuts and dates for about an hour.
- Pit and peel the dates.
- Add to a food processor*, along with the drained walnuts and cacao and sea salt.
- Pulse until a dough is formed. I let mine run a bit too long and so it was more paste-y, but so delicious still.
- In a glass baking dish* lined with parchment paper, press the dough down until an even layer is formed.
- Cover and place in the fridge until the frosting is ready.
For the Frosting:
- Combine everything in a food processor and process until it is fully incorporated.
- Pour the frosting over the brownie and place back in the fridge to set.
- I left mine in overnight so it could harden completely.
On the Tenth Day of Christmas- well yes I did miss a day
On the Tenth Day of Christmas - I recovered from a stomach virus and lovingly bring you this recipe.
http://www.onegreenplanet.org/vegan-recipe/peppermint-brownies/
Peppermint Brownies [Vegan, Raw, Gluten-Free]
This Recipe is :
Dairy FreeRaw VeganVeganWheat FreeServes
8-12Ingredients
For the Brownies:
- 2 cups walnuts
- 2 cups dates, soaked and pitted
- 3 Tbs cacao powder
- pinch of sea salt
- 1/2 cup coconut butter
- 1/4 cup coconut oil
- 2 Tbs maple syrup
- 1 tsp peppermint extract
Preparation
For the Brownies:
- Soak the walnuts and dates for about an hour.
- Pit and peel the dates.
- Add to a food processor*, along with the drained walnuts and cacao and sea salt.
- Pulse until a dough is formed. I let mine run a bit too long and so it was more paste-y, but so delicious still.
- In a glass baking dish* lined with parchment paper, press the dough down until an even layer is formed.
- Cover and place in the fridge until the frosting is ready.
For the Frosting:
- Combine everything in a food processor and process until it is fully incorporated.
- Pour the frosting over the brownie and place back in the fridge to set.
- I left mine in overnight so it could harden completely.
Sunday, December 21, 2014
On the Eighth Day of Christmas...
Ok - I am drooling over this recipe.
Chocolate Coated Hazelnut Truffles [Vegan, Gluten-Free]

This Recipe is :
Dairy FreeHealthyHigh FiberKid-FriendlyRaw VeganSoy FreeSugar Free / Low SugarVeganWheat FreeServes
15-18Ingredients
- 1.5 cups hazelnuts
- 1/4 tsp stevia
- 1/2 tsp nutritional yeast *optional
- 1 tsp vanilla
- Pinch sea salt
- 1 cup and 1 Tbsp raw cacao powder
- 3/4 cup coconut oil
- 1/4 cup maple syrup
- 1 Tbsp cup goji berries, processed or finely chopped for garnish
Preparation
- Place hazelnuts in a food processor and grind until they becomes a mealy flour. Remove 1 Tbsp of hazelnut flour from the food processor to use as garnish.
- Add stevia, nutritional yeast, vanilla and salt to the food processor the grind for about 5-10 minutes, scraping down the sides as necessary. Keep grinding until the mixture becomes a paste that sticks together when you scrape down the sides. Side note: If you want to make a yummy hazelnut butter keep processing!
- Form the mixture into 1 Tbsp sized truffles and freeze for 30 minutes.
- While the truffles are freezing, make the dark chocolate shell by mixing 1 cup raw cacao with melted coconut oil and maple syrup. This mixture should be thick and drippy. If it is too thick place it on the low heat to loosen it up, if it is too thin add additional cacao powder.
- Once the truffles have hardened, dip them in the shell and put them back in the freezer for 10 minutes to set.
- Dip the truffles in the chocolate mixture once more and sprinkle with ground hazelnuts, a dusting of raw cacao powder or goji berry pieces immediately. Place in the freezer to set for 1.5 hours.
- Before serving, thaw at room temperature for 20 minutes or in the fridge for 2 hours.
On the Eighth Day of Christmas...
Ok - I am drooling over this recipe.
Chocolate Coated Hazelnut Truffles [Vegan, Gluten-Free]
This Recipe is :
Dairy FreeHealthyHigh FiberKid-FriendlyRaw VeganSoy FreeSugar Free / Low SugarVeganWheat FreeServes
15-18Ingredients
- 1.5 cups hazelnuts
- 1/4 tsp stevia
- 1/2 tsp nutritional yeast *optional
- 1 tsp vanilla
- Pinch sea salt
- 1 cup and 1 Tbsp raw cacao powder
- 3/4 cup coconut oil
- 1/4 cup maple syrup
- 1 Tbsp cup goji berries, processed or finely chopped for garnish
Preparation
- Place hazelnuts in a food processor and grind until they becomes a mealy flour. Remove 1 Tbsp of hazelnut flour from the food processor to use as garnish.
- Add stevia, nutritional yeast, vanilla and salt to the food processor the grind for about 5-10 minutes, scraping down the sides as necessary. Keep grinding until the mixture becomes a paste that sticks together when you scrape down the sides. Side note: If you want to make a yummy hazelnut butter keep processing!
- Form the mixture into 1 Tbsp sized truffles and freeze for 30 minutes.
- While the truffles are freezing, make the dark chocolate shell by mixing 1 cup raw cacao with melted coconut oil and maple syrup. This mixture should be thick and drippy. If it is too thick place it on the low heat to loosen it up, if it is too thin add additional cacao powder.
- Once the truffles have hardened, dip them in the shell and put them back in the freezer for 10 minutes to set.
- Dip the truffles in the chocolate mixture once more and sprinkle with ground hazelnuts, a dusting of raw cacao powder or goji berry pieces immediately. Place in the freezer to set for 1.5 hours.
- Before serving, thaw at room temperature for 20 minutes or in the fridge for 2 hours.
Saturday, December 20, 2014
It's Getting Closer -
On the Seventh Day of Christmas my true love made for me.....
Almond Butter Holiday Cookies [Vegan]
No Christmas party or holiday meal is complete without these gluten free Almond Butter Cookies. They make a great substitute for traditional Christmas cookies, which are often loaded with refined sugars, gluten and unhealthy fats. Serve them as they are – buttery smooth cookie dough pleasure! – or dehydrate them until they are crunchy on the outside, and warm & soft on the inside.
Almond Butter Holiday Cookies [Vegan]
 |
| Almond Butter Holiday Coolies from One Green Planet |
No Christmas party or holiday meal is complete without these gluten free Almond Butter Cookies. They make a great substitute for traditional Christmas cookies, which are often loaded with refined sugars, gluten and unhealthy fats. Serve them as they are – buttery smooth cookie dough pleasure! – or dehydrate them until they are crunchy on the outside, and warm & soft on the inside.
This Recipe is :
Dairy Free VeganServes
10 - 15Ingredients
- ½ cup almond butter
- ½ cup almond meal
- ¼ cup coconut oil
- ¼ cup coconut flour
- 5 tablespoons date paste
- 20 drops of pure liquid Stevia (or extra date paste)
- 1 teaspoon of pure vanilla extract
- 5 drops of almond extract (optional)
- 1/8 teaspoon of Himalayan Crystal salt or sea salt
Preparation
- Warm up the coconut butter until it turns into liquid coconut oil. Remove the oil from the stove and let it cool down.
- Combine almond butter, almond meal, coconut oil, coconut flour, date pasta, Stevia, vanilla extract, almond extract and salt in the food processor. Mix until all the ingredients turn into a big cookie dough ball.
- Form the cookie dough into forms of your choice.
- Place the cookies onto a dehydrator tray lined with a Teflex sheet. Dehydrate at 115°F for 20 hours or more, until they are crispy on the outside and slightly soft on the inside.
Notes
• If the cookies are still slightly moist inside, they will stay fresh for at least 10 days in an airtight container in the refrigerator.
• If the cookies are completely dry and crispy, you will be able to store them for at least 2 months in an airtight container in a cool, dry place.
• Try experimenting with other types of ‘butter’ for different flavor variations. I’m thinking tahini, sunflower seeds, pumpkin seeds, walnuts, pecans, cashews, macadamias, hazelnuts, brazil nuts, pine nuts, pistachios…
Subscribe to:
Posts (Atom)